Shopify SMS Integration
Integrating Shopify with SMS is a sure fire way to improve your response times to important stages in the customer’s journey. If you’re running a store and have limited time, and therefore don’t have time to keep checking your backend, SMS can can help in a significant way.
Shopify is one of the 500+ apps available on Zapier, therefore it can now talk to the Esendex SMS platform. You will now be able to send yourself an SMS every time a new order is paid for, a delivery is required, an order is cancelled, or a new customer is added. Having quick notifications can ensure deliveries go out as soon as possible or even to hold off on a delivery if an order is cancelled.
Integrating Shopify with Esendex to send SMS
Using Zapier is the quickest and simplest way to SMS enable your Shopify store. It is also our recommended method of integration.
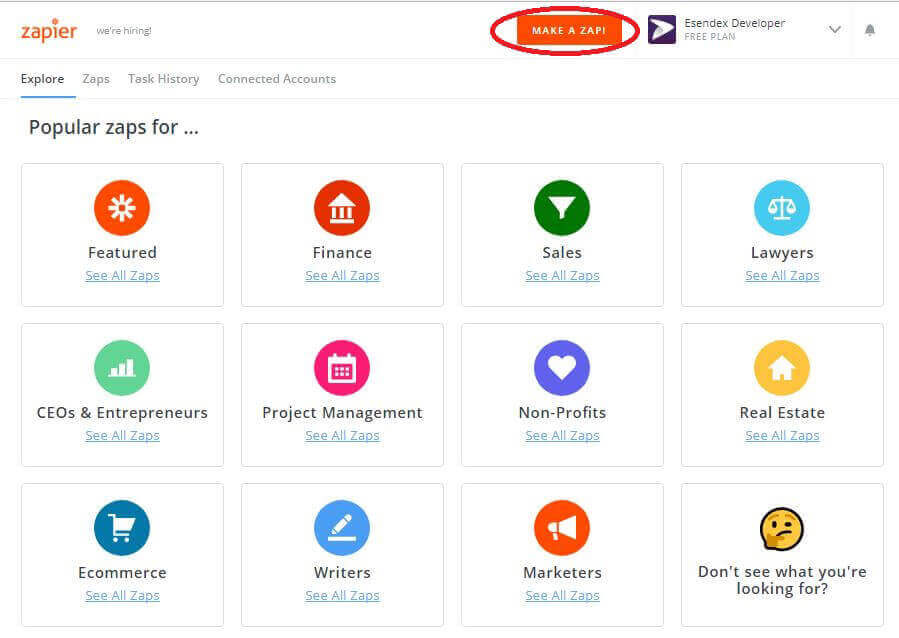
Choose from pre-made templates and get sending in minutes
Create your zap here, without even leaving our site
This guide will use an example of a cancelled order to set up a trigger that will send a text message with the relevant details of the cancelled order.
For the purposes of our example below you will need:
- A Zapier premium account
- A free Esendex account
- A Shopify account
Learn to Send SMS with Shopify
Once you have the above, you’ll need to use this link to activate the Esendex Zap on your account. Now you can start building the Shopify to Esendex zap.
Setting up a Zap is a very simple process, however, we have created step by step instructions to help you with your first one:
1. Log into your Zapier account and you’ll see the below screen. Click on ‘Make a new Zap’ which is located in numerous places to make it easy to find.
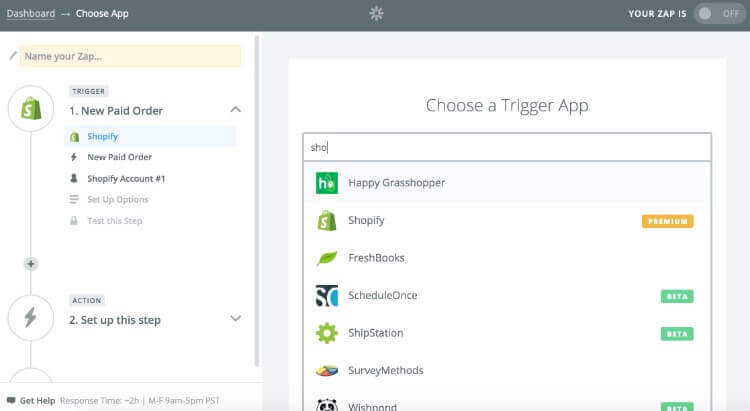
2. Choose your Trigger, which in this case will be Shopify. You do this by simply searching for ‘shopify’ in the search box.
3. Choose the criteria for your Shopify trigger. For example a New Paid Order, we want to know at the moment someone pays for an order so that it can be packaged up and send out as soon as possible.

4. Connect your Shopify account by following the instructions.
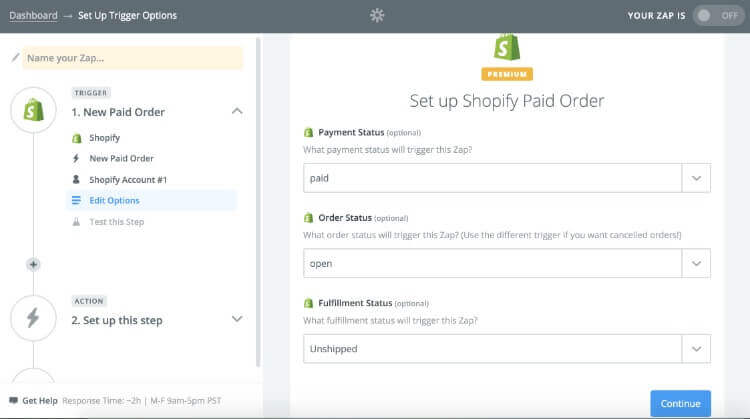
5. Select some more specific criteria to make sure you only receive SMS messages when you absolutely want to. We’re going to select the Payment Status as Paid, the Order Status as Open, and the Fulfilment Status as Unshipped, as we want to be informed so we can get the purchase shipped. You can choose what is suitable for your own needs.
6. At this point you’ll need to make sure you have at least one paid order that is unshipped to test the trigger. Alternatively, you can skip the test until you have an order in there.
You should get the above ‘Test Successful’ page. If you didn’t, go to your Shopify account and make sure there is an undelivered but paid for order in there, if there aren’t any orders matching that criteria, create one or skip the test and come back when there is one.
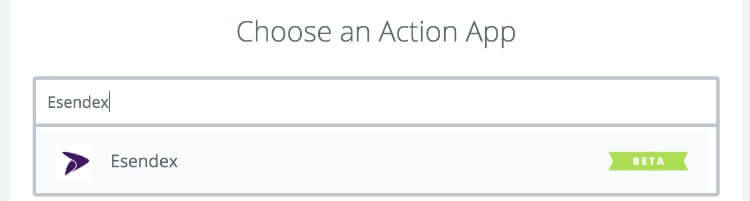
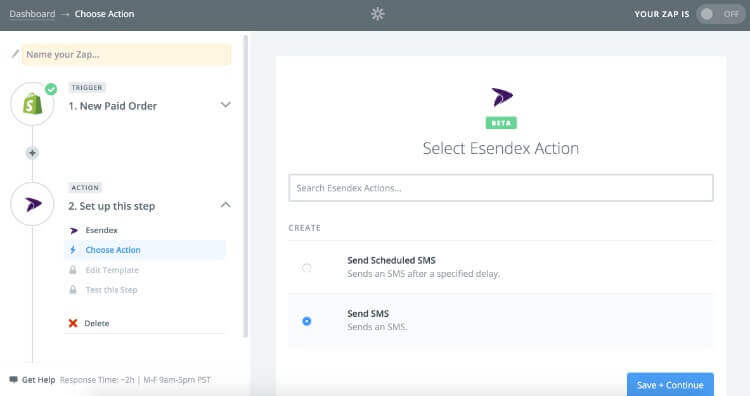
7. Choose an Action App, which will be the Esendex app. Simply search for Esendex in the search box. If it’s not appearing, you may still have to activate the Esendex Zap.
8. You will have two options: ‘Send Scheduled SMS’ or ‘Send SMS’.
Send scheduled SMS – trigger an SMS to be scheduled for a delayed send, for example 10 minutes after the trigger is activated.
Send SMS – send an SMS as soon as the trigger is activated.
Make your choice and click ‘Save + Continue’.
9.Connect your Esendex Account to Zapier. Choose ‘Connect a New Account’ and follow the steps to add your esendex account. The username and password are the same as that you use for logging into your Esendex Echo account. The username will be an email address.
10. Set up the message recipient and template to use. First up, enter the phone number you wish to send the SMS to. To send to multiple contacts, separate each phone number with a comma.
The message template can contain many different dynamic fields, and can be as complex as you need it to be. Type out the body of the message and add dynamic fields by clicking on this symbol  found in the top right of the text box. If you skipped the test, you won’t be able to find any dynamic fields.
For this example we’ll keep it simple. We just want to alert ourselves to a new order being paid. We’ll need to access our shop to get all the details and process the order anyway.
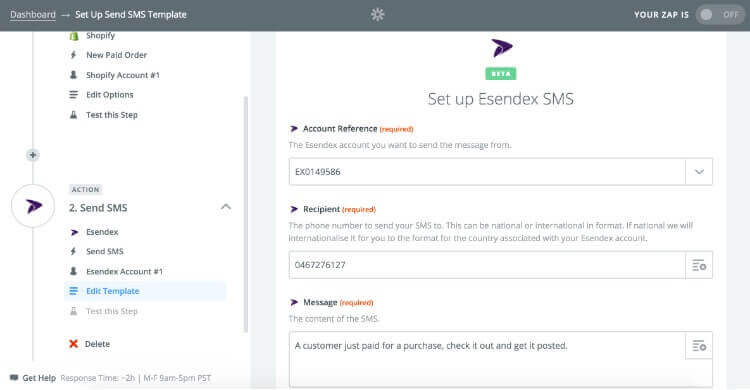
Connect your Esendex account simply by clicking “Connect a New Account”
11. Click Continue and test that the message works.
12. ‘Name your Zap…’ and turn it on. Now every time a new order is paid for, you will receive an SMS alert.
Zapier is a powerful tool and can connect many different apps. Check out some of our Zapier Integration guide or any of your other integration guides.