Zapier SMS Integration
Integrate with Zapier to send SMS through your software
By using Esendex SMS with Zapier, you open up a whole world of communication channel opportunities. With over 1000 applications available on Zapier, you have the possibility to link hundreds of online applications to trigger an SMS.
Zapier works by linking two applications together that wouldn’t usually talk to each other. One app is the Trigger, the event that occurs that will prompt an action. The Action is the event that you want to carry out, in this case that will be to send an SMS.
Choose from pre-made templates and get sending SMS in minutes
Create your zap here without leaving our site:
Integrating Zapier with Esendex to send SMS
How to send SMS with Gmail
Due to the simplicity of Zapier, we’ll use an example that you will likely be able to follow in order to set up your first ‘Zap’. For this example we’re going to set up a zap to send an SMS when you receive an email with a subject line containing the word ‘urgent.’
For the purposes of this example, you will need:
- A Zapier account
- n Esendex account (free trial available if you don’t already have one)
- A Gmail account
Once you have the above, you’ll need to use this link to activate the Esendex Zap on your account. Now you’re ready to build your Gmail to SMS zap.
Setting up a Zap is a very simple process, however, we have created step by step instructions to help you with your first one:
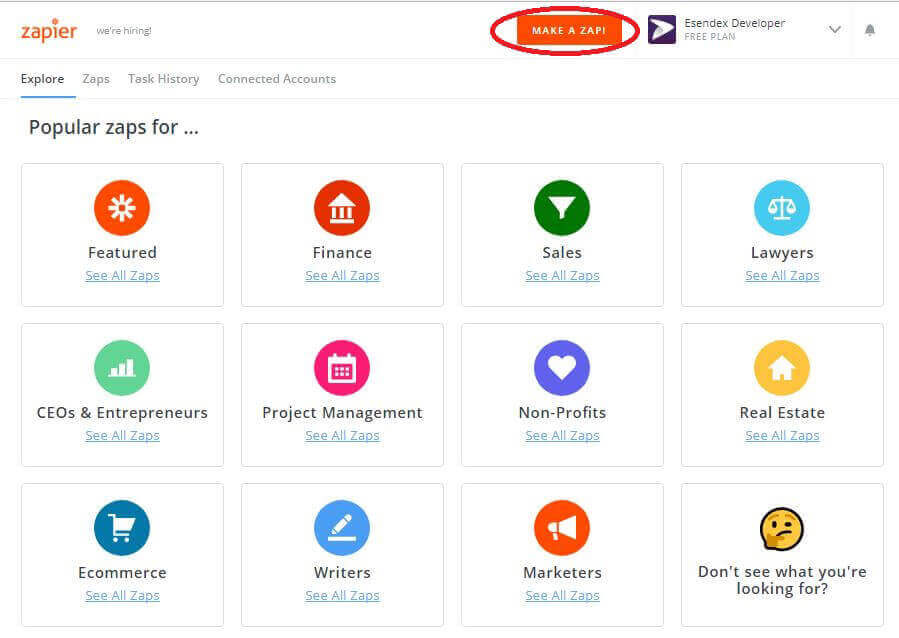
1. Log into your Zapier account and you’ll see the below screen. Click on ‘Make a new Zap’ which is located in numerous places to make it easy to find.
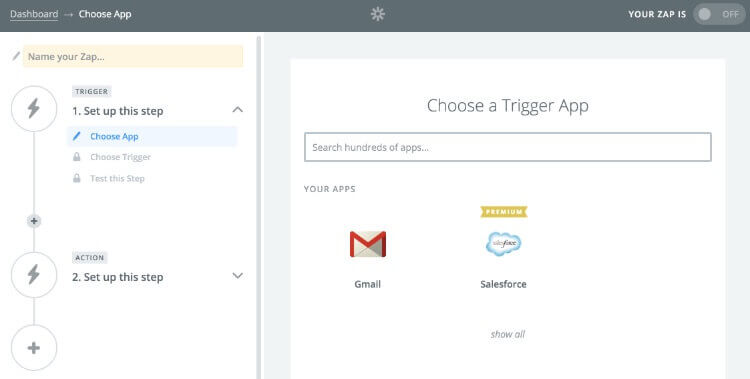
2. Choose your Trigger, which in this case will be Gmail. You do this by simply searching for ‘Gmail’ in the search box.
3. Choose a more specific criteria for your Gmail trigger. For this example we’re looking for the subject line to contain the word ‘urgent.’ To do this you’ll need to choose the option ‘New Email Matching Search’.

4. Connect your Gmail account, you can do so here. Click ‘Connect a New Account’, and follow the steps to add your desired Gmail account.
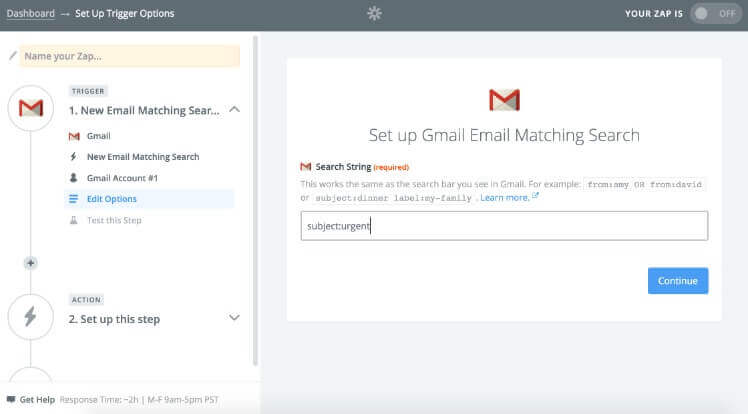
5. Set up the ‘Email Matching Search’, simply enter the search criteria in the same way that you would use in Gmail’s search bar, for example “subject:urgent” or ‘from:andy’. For this example write in ‘subject:urgent’.
6. You will be asked to test that your Trigger is working, to do this make sure you have at least one email in your account that matches the search criteria. In this case, make sure you have an email that has a subject line containing the word ‘urgent’.
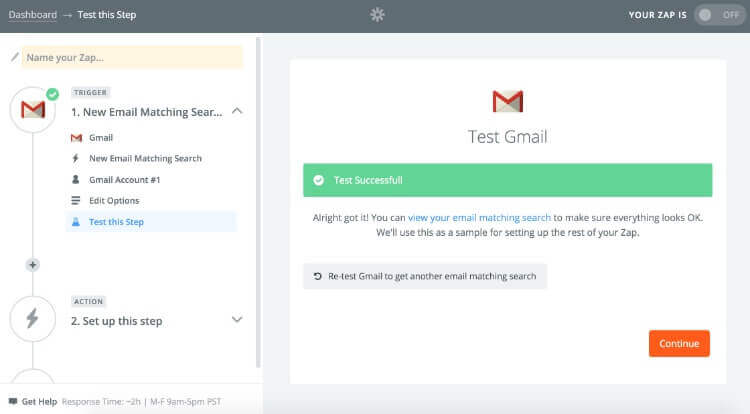
You should get the above ‘Test Successful’ page. If you didn’t, go to your Gmail account and search for urgent, if there aren’t any emails in your inbox with this criteria, send yourself one and test again. Continue when successful.
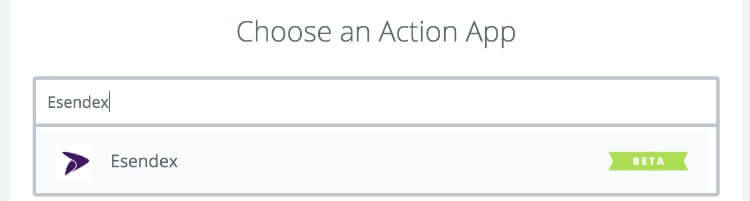
7. ‘Choose an Action App’. Search for Esendex in the search box and choose our app.
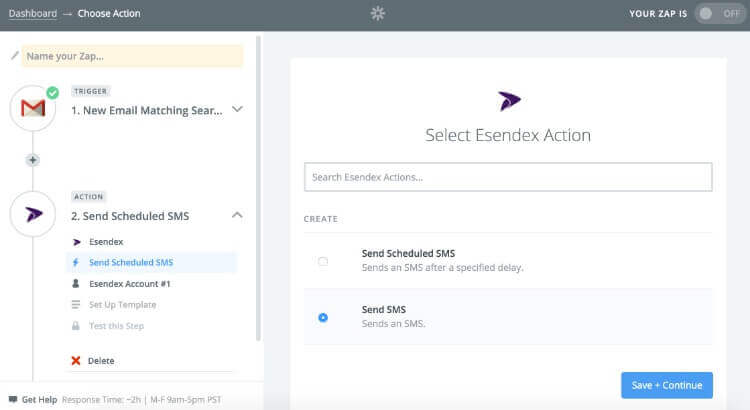
8. You will have two options: ‘Send Scheduled SMS’ or ‘Send SMS’.
Send scheduled SMS – trigger an SMS to be scheduled for a delayed send, for example 10 minutes after the trigger is activated.
Send SMS – send an SMS as soon as the trigger is activated.
Make your choice and click ‘Save + Continue’.
9. Connect your Esendex Account to Zapier. Choose ‘Connect a New Account’ and follow the steps to add your esendex account. The username and password are the same as that you use for logging into your Esendex Echo account. The username will be an email address.
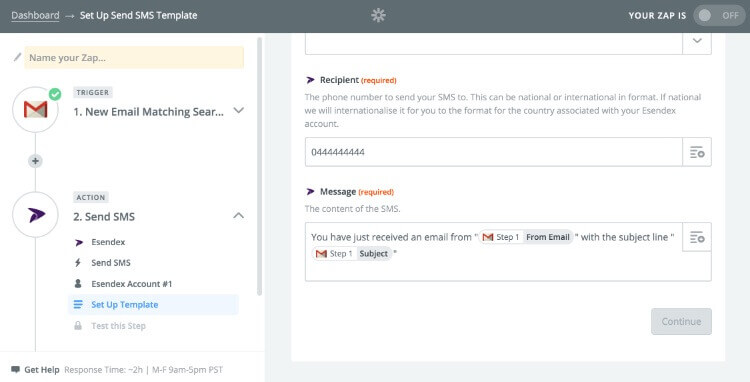
10. Set up the message recipient and template to use. First up, enter the phone number you wish to send the SMS to. To send to multiple contacts, separate each phone number with a comma.
The message template can contain many different dynamic fields, and can be as complex as you need it to be. For this example we’ll keep it simple. We just want to know who the email was from and what the subject line is.
Type out the body of the message and add dynamic fields by clicking on this symbol  found in the top right of the text box.
11. Click Continue and test that the message works, it will pull the details from the email you used in the email testing phase.
12. ‘Name your Zap…’ and turn it on. Bear in mind that Zapier only pulls from Gmail every 15 minutes, so when you’re testing whether it works for real, give it time to pull the newest email.
Now you’re familiar with how to set up a Zap, have a look through the apps and see what you can create to make your life easier with SMS.
Here are a few of our favourites:
- Zendesk: ‘New Ticket to Esendex’ – have an SMS update sent to a mobile phone alerting of incoming customer support tickets.
- Braintree: ‘New Transaction to Esendex’ – when a customer’s payment is received have an SMS send to your phone.
- Shopify: ‘New Cancelled Order to Esendex’ – send an SMS when orders are cancelled, so you can react to cancelled orders more quickly.
- Magento: ‘New Order to Esendex’ – notify yourself via SMS when a new order has been received, allowing you to quickly process that order and keep your customers happy.
- EVE online (for the gamers): ‘New Market Transaction to Esendex’ – notify yourself as soon as a market transfer occurs.